Wax and Maintenance
↳ Cross Country Skiing
↳ Wax and Maintenance
↳ Climbing and Via Ferrata
↳ Ski Touring and Avalanche Equipment
↳ Roller Skis
The correct waxing of your skis is not unimportant. So here are a few important points to keep in mind:
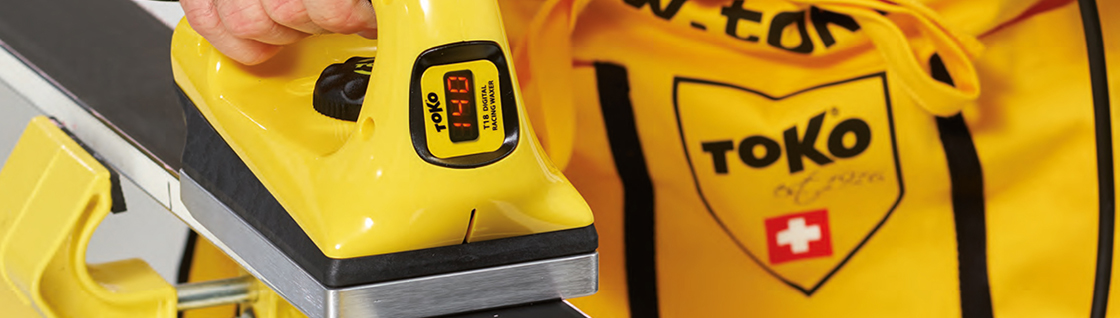
GLIDE WAX
Glide waxes are available as hot wax and cold wax. Hot wax is available in sticks and is liquefied with low heat, for example with a household iron or a special wax iron, and worked into the base. Cold wax is available as a liquid wax for spraying or application and as a hard wax for rubbing on the base. The hot wax application is much more durable than the cold wax application.
The wax layer has the welcome side effect of protecting the running surfaces of the skis. One disadvantage, however, is that dirt particles collect in the wax; After a certain distance, a waxed ski can become slower than an unwaxed one.
Apply the respective wax - tailored to the conditions of the day. To do this, press the wax onto the hot iron and allow the wax to drain onto the base, then check the ironing temperature. The temperature to be used is stated on the wax packaging. Then use the iron to distribute the wax evenly from the tip to the end. After applying the wax, let the ski cool down to room temperature (duration: approx. 10 minutes). Then remove the excess wax from the middle groove with a grooved spatula and a scraper (preferably plastic for beginners or metal for advanced users) from the base. It is best to start at the tip and pull off evenly to the end of the ski. Finally, the structure of the covering should be brushed out with a medium-hard brush in the running direction
APPLICATION OF BASE WAXES AND UPPER WAXES FOR DRY SNOW CONDITIONS
Have the climbing zone of your ski measured precisely in a specialist shop. Roughen the riser zone with sandpaper (120 grit). Always move the sandpaper back and forth lengthways. The grinding must always take place after the preparation of the gliding zone. Mask the transitions between the gliding and climbing zones with an adhesive strip so that no klister or climbing wax gets on the gliding zone! Then apply a layer of base wax to the rise zone. Using a cork, work the base wax thoroughly into the base. Then spread a suitable hard wax, depending on the daytime temperatures, with a cork over the previously applied base wax. Also work in again thoroughly with the cork. There should be at least three to six layers.
TIP:
Work carefully with the cork. An even layer prevents the risk of ice formation.
PREPARATION WITH KLISTER IN ICY OR WET CONDITIONS
Sand the rise zone with sandpaper (100 grit). Again, always in the longitudinal direction and always after the gliding zone preparation. Mask off the transitions between the gliding and climbing zones with an adhesive strip so that no klister or climbing wax gets on the gliding zone. Apply the basic klister very thinly to the roughened climbing zone and rub it in thoroughly with the ball of the hand, thumb or cork. Then remove the klister from the groove. Then apply the suitable klister for the day to the basic klister - note the daytime temperature. Work evenly into the structure again and finally remove the excess klister from the central groove with the help of a grooved spatula.
CLEANING THE CLIMBING AREA AFTEWARDS
Peel off as much wax as possible with a scraper. Remove the rest with wax remover and a suitable cloth.
↳ Wax and Maintenance
↳ Climbing and Via Ferrata
↳ Ski Touring and Avalanche Equipment
↳ Roller Skis
The correct waxing of your skis is not unimportant. So here are a few important points to keep in mind:
GLIDE WAX
Glide waxes are available as hot wax and cold wax. Hot wax is available in sticks and is liquefied with low heat, for example with a household iron or a special wax iron, and worked into the base. Cold wax is available as a liquid wax for spraying or application and as a hard wax for rubbing on the base. The hot wax application is much more durable than the cold wax application.
The wax layer has the welcome side effect of protecting the running surfaces of the skis. One disadvantage, however, is that dirt particles collect in the wax; After a certain distance, a waxed ski can become slower than an unwaxed one.
Apply the respective wax - tailored to the conditions of the day. To do this, press the wax onto the hot iron and allow the wax to drain onto the base, then check the ironing temperature. The temperature to be used is stated on the wax packaging. Then use the iron to distribute the wax evenly from the tip to the end. After applying the wax, let the ski cool down to room temperature (duration: approx. 10 minutes). Then remove the excess wax from the middle groove with a grooved spatula and a scraper (preferably plastic for beginners or metal for advanced users) from the base. It is best to start at the tip and pull off evenly to the end of the ski. Finally, the structure of the covering should be brushed out with a medium-hard brush in the running direction
APPLICATION OF BASE WAXES AND UPPER WAXES FOR DRY SNOW CONDITIONS
Have the climbing zone of your ski measured precisely in a specialist shop. Roughen the riser zone with sandpaper (120 grit). Always move the sandpaper back and forth lengthways. The grinding must always take place after the preparation of the gliding zone. Mask the transitions between the gliding and climbing zones with an adhesive strip so that no klister or climbing wax gets on the gliding zone! Then apply a layer of base wax to the rise zone. Using a cork, work the base wax thoroughly into the base. Then spread a suitable hard wax, depending on the daytime temperatures, with a cork over the previously applied base wax. Also work in again thoroughly with the cork. There should be at least three to six layers.
TIP:
Work carefully with the cork. An even layer prevents the risk of ice formation.
PREPARATION WITH KLISTER IN ICY OR WET CONDITIONS
Sand the rise zone with sandpaper (100 grit). Again, always in the longitudinal direction and always after the gliding zone preparation. Mask off the transitions between the gliding and climbing zones with an adhesive strip so that no klister or climbing wax gets on the gliding zone. Apply the basic klister very thinly to the roughened climbing zone and rub it in thoroughly with the ball of the hand, thumb or cork. Then remove the klister from the groove. Then apply the suitable klister for the day to the basic klister - note the daytime temperature. Work evenly into the structure again and finally remove the excess klister from the central groove with the help of a grooved spatula.
CLEANING THE CLIMBING AREA AFTEWARDS
Peel off as much wax as possible with a scraper. Remove the rest with wax remover and a suitable cloth.
HERE you can find our huge assortment of wax and wax accessories. If you have any further questions, please contact our wax professionals by phone: +43(0)3687/81000

Don′t miss any offers, news and important informations with our newsletter!
© 2026 Sport Ski Willy • All rights reserved
modified eCommerce Shopsoftware © 2009-2026 • Realization and programming Rehm Webdesign
modified eCommerce Shopsoftware © 2009-2026 • Realization and programming Rehm Webdesign